

Create Your First Product
Follow these steps to publish your first product and make it available to customers.
Create the product
From your dashboard, go to Products and click Add Product.
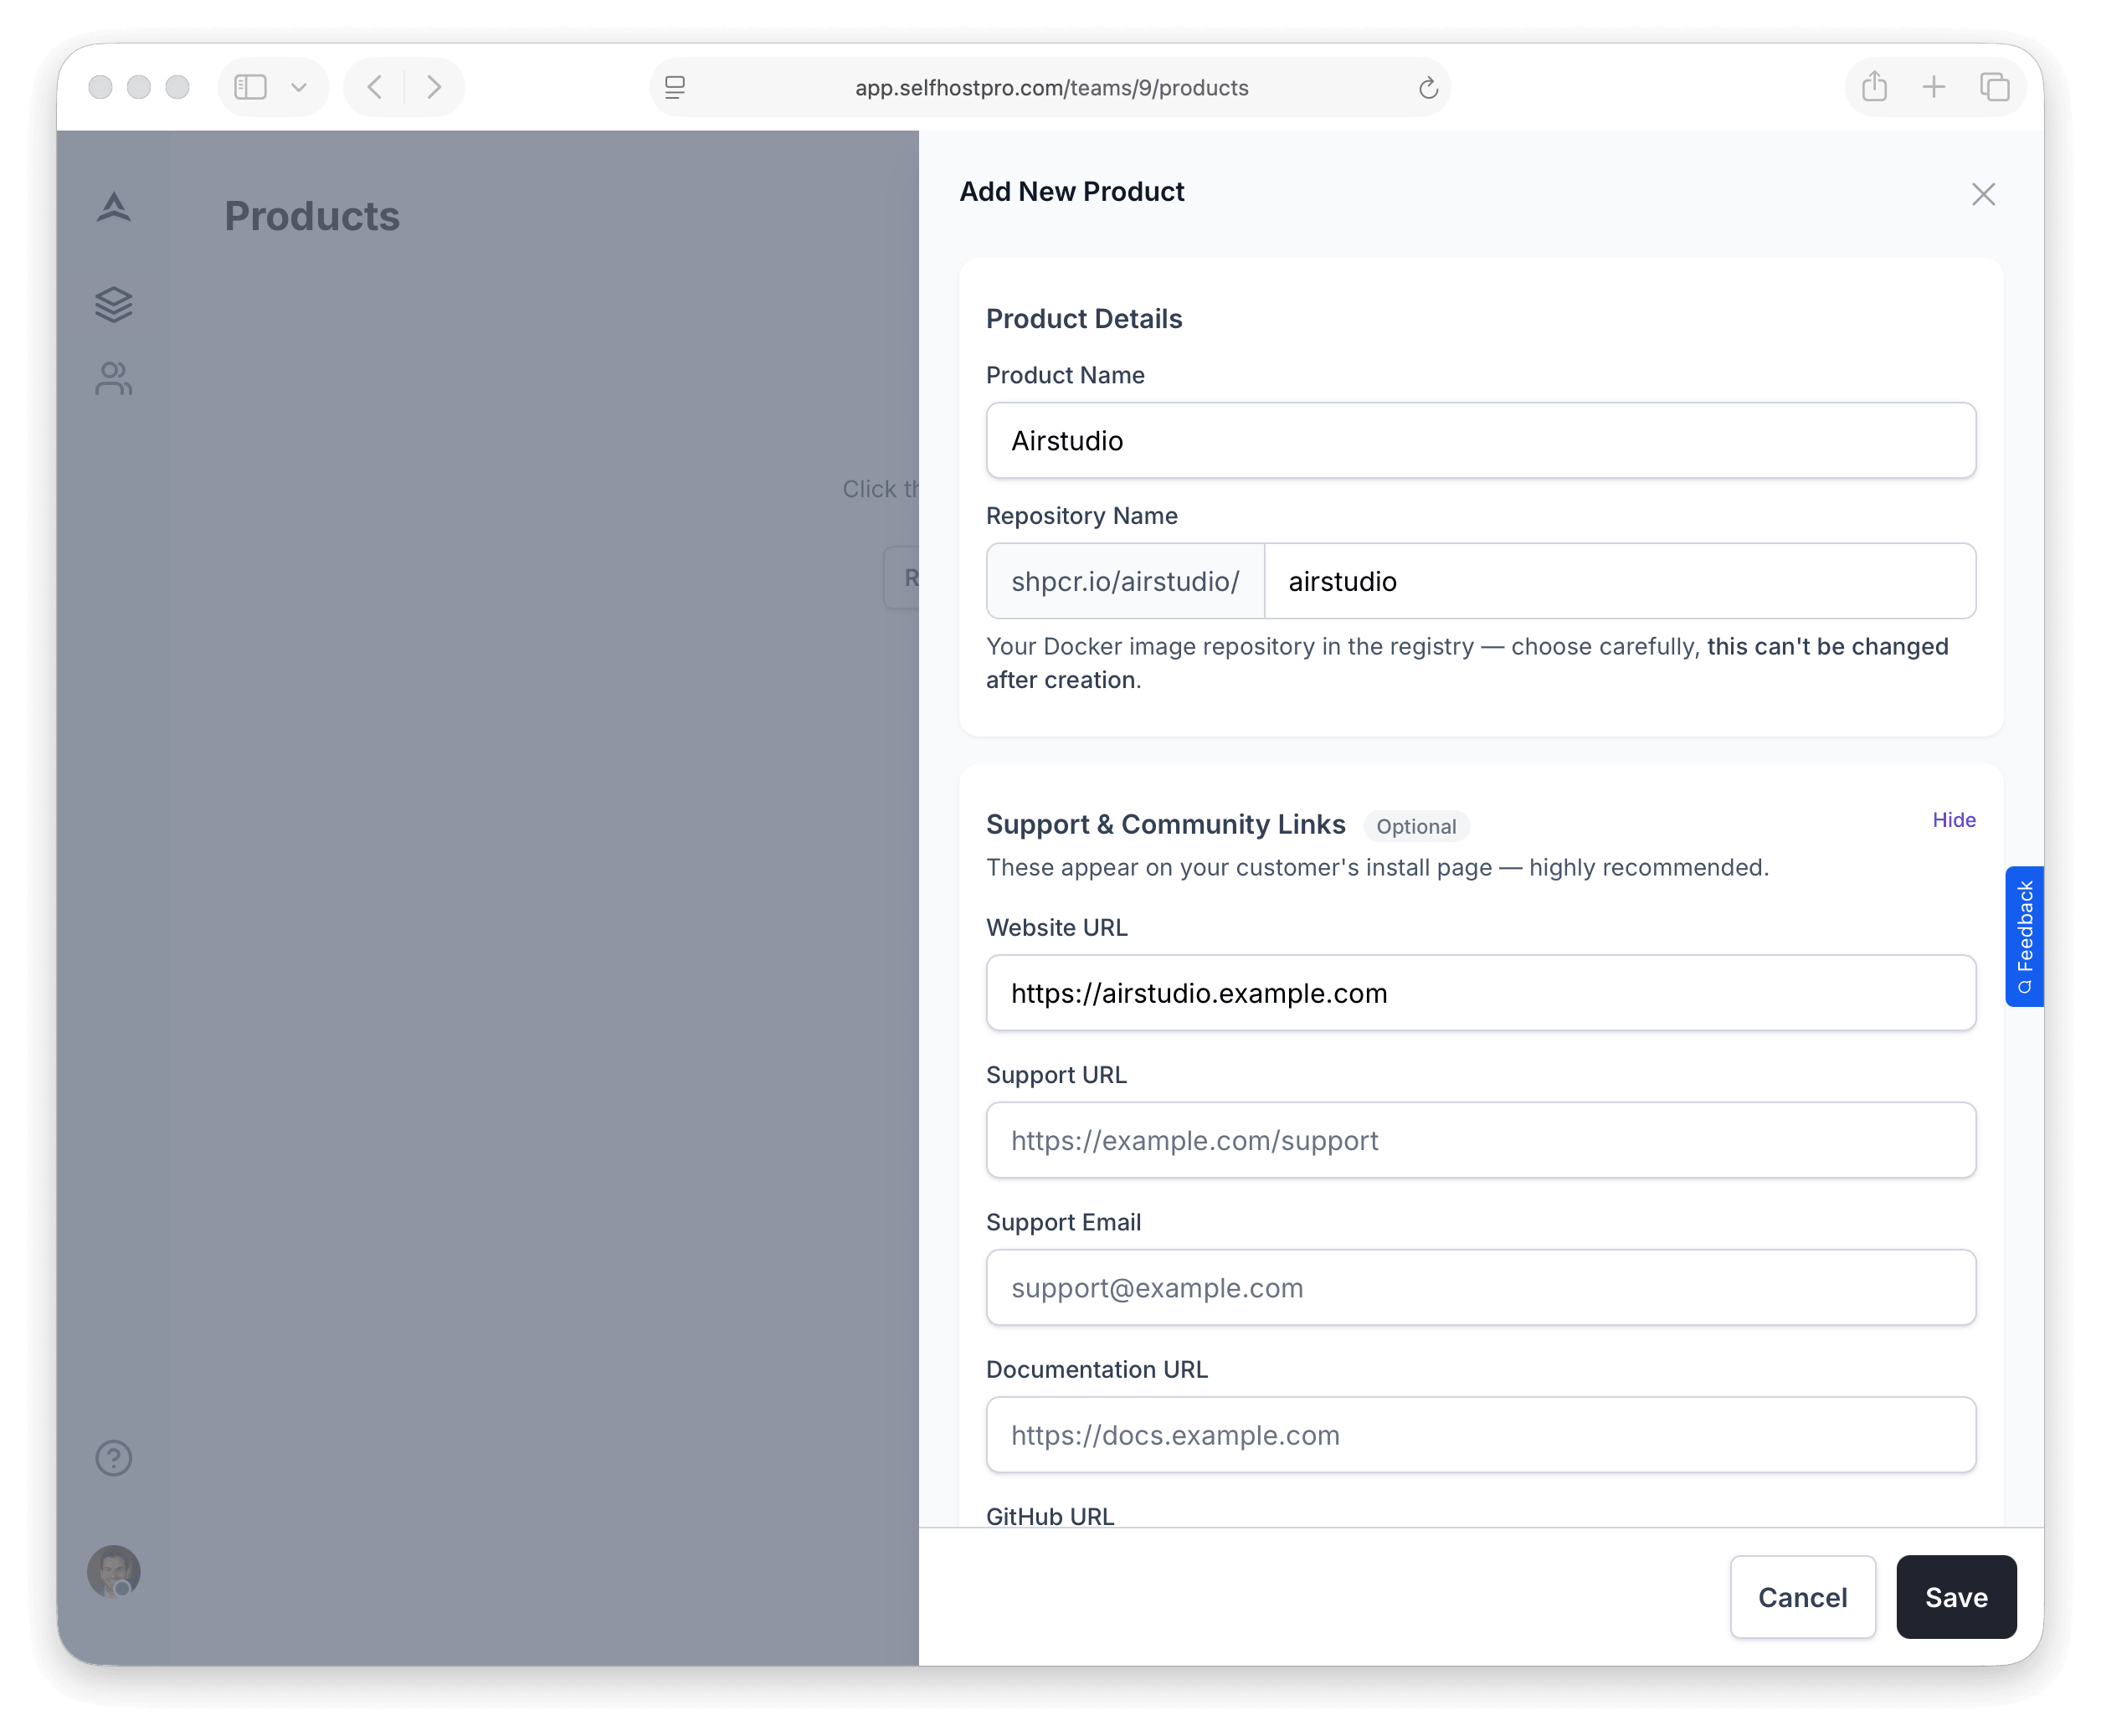
- Name — The display name customers will see (e.g., "Airstudio")
- URL — A unique slug used in registry paths and install paths (e.g.,
airstudio→shpcr.io/your-team/airstudio) - Website — Your product’s public site (optional but useful for customers)
- Logo — Optional product icon
You can also add optional support and community links:
- Support email
- Support URL
- Documentation URL
- GitHub repository
- Discord server
- Community forum
Draft vs Active
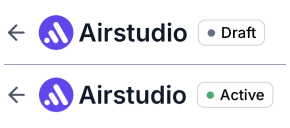
Each product shows a Draft or Active status. It becomes Active when all of the following are true:
- At least one Docker image has been pushed to this product’s registry
- At least one variation has image tag rules configured
- At least one variation has a marketplace product linked (Stripe or Lemon Squeezy)
- At least one variation has a Docker Compose file
Usually you add all of this on the same variation before selling. Until those conditions are met, the product stays Draft. You can still configure images and variations while it is in draft.
Push your Docker image
Before creating a variation, push your Docker image to Self-Host Pro’s private registry at shpcr.io. You publish builds here; later, customers authenticate to pull only when their purchase or subscription gives them access.
Generate registry credentials
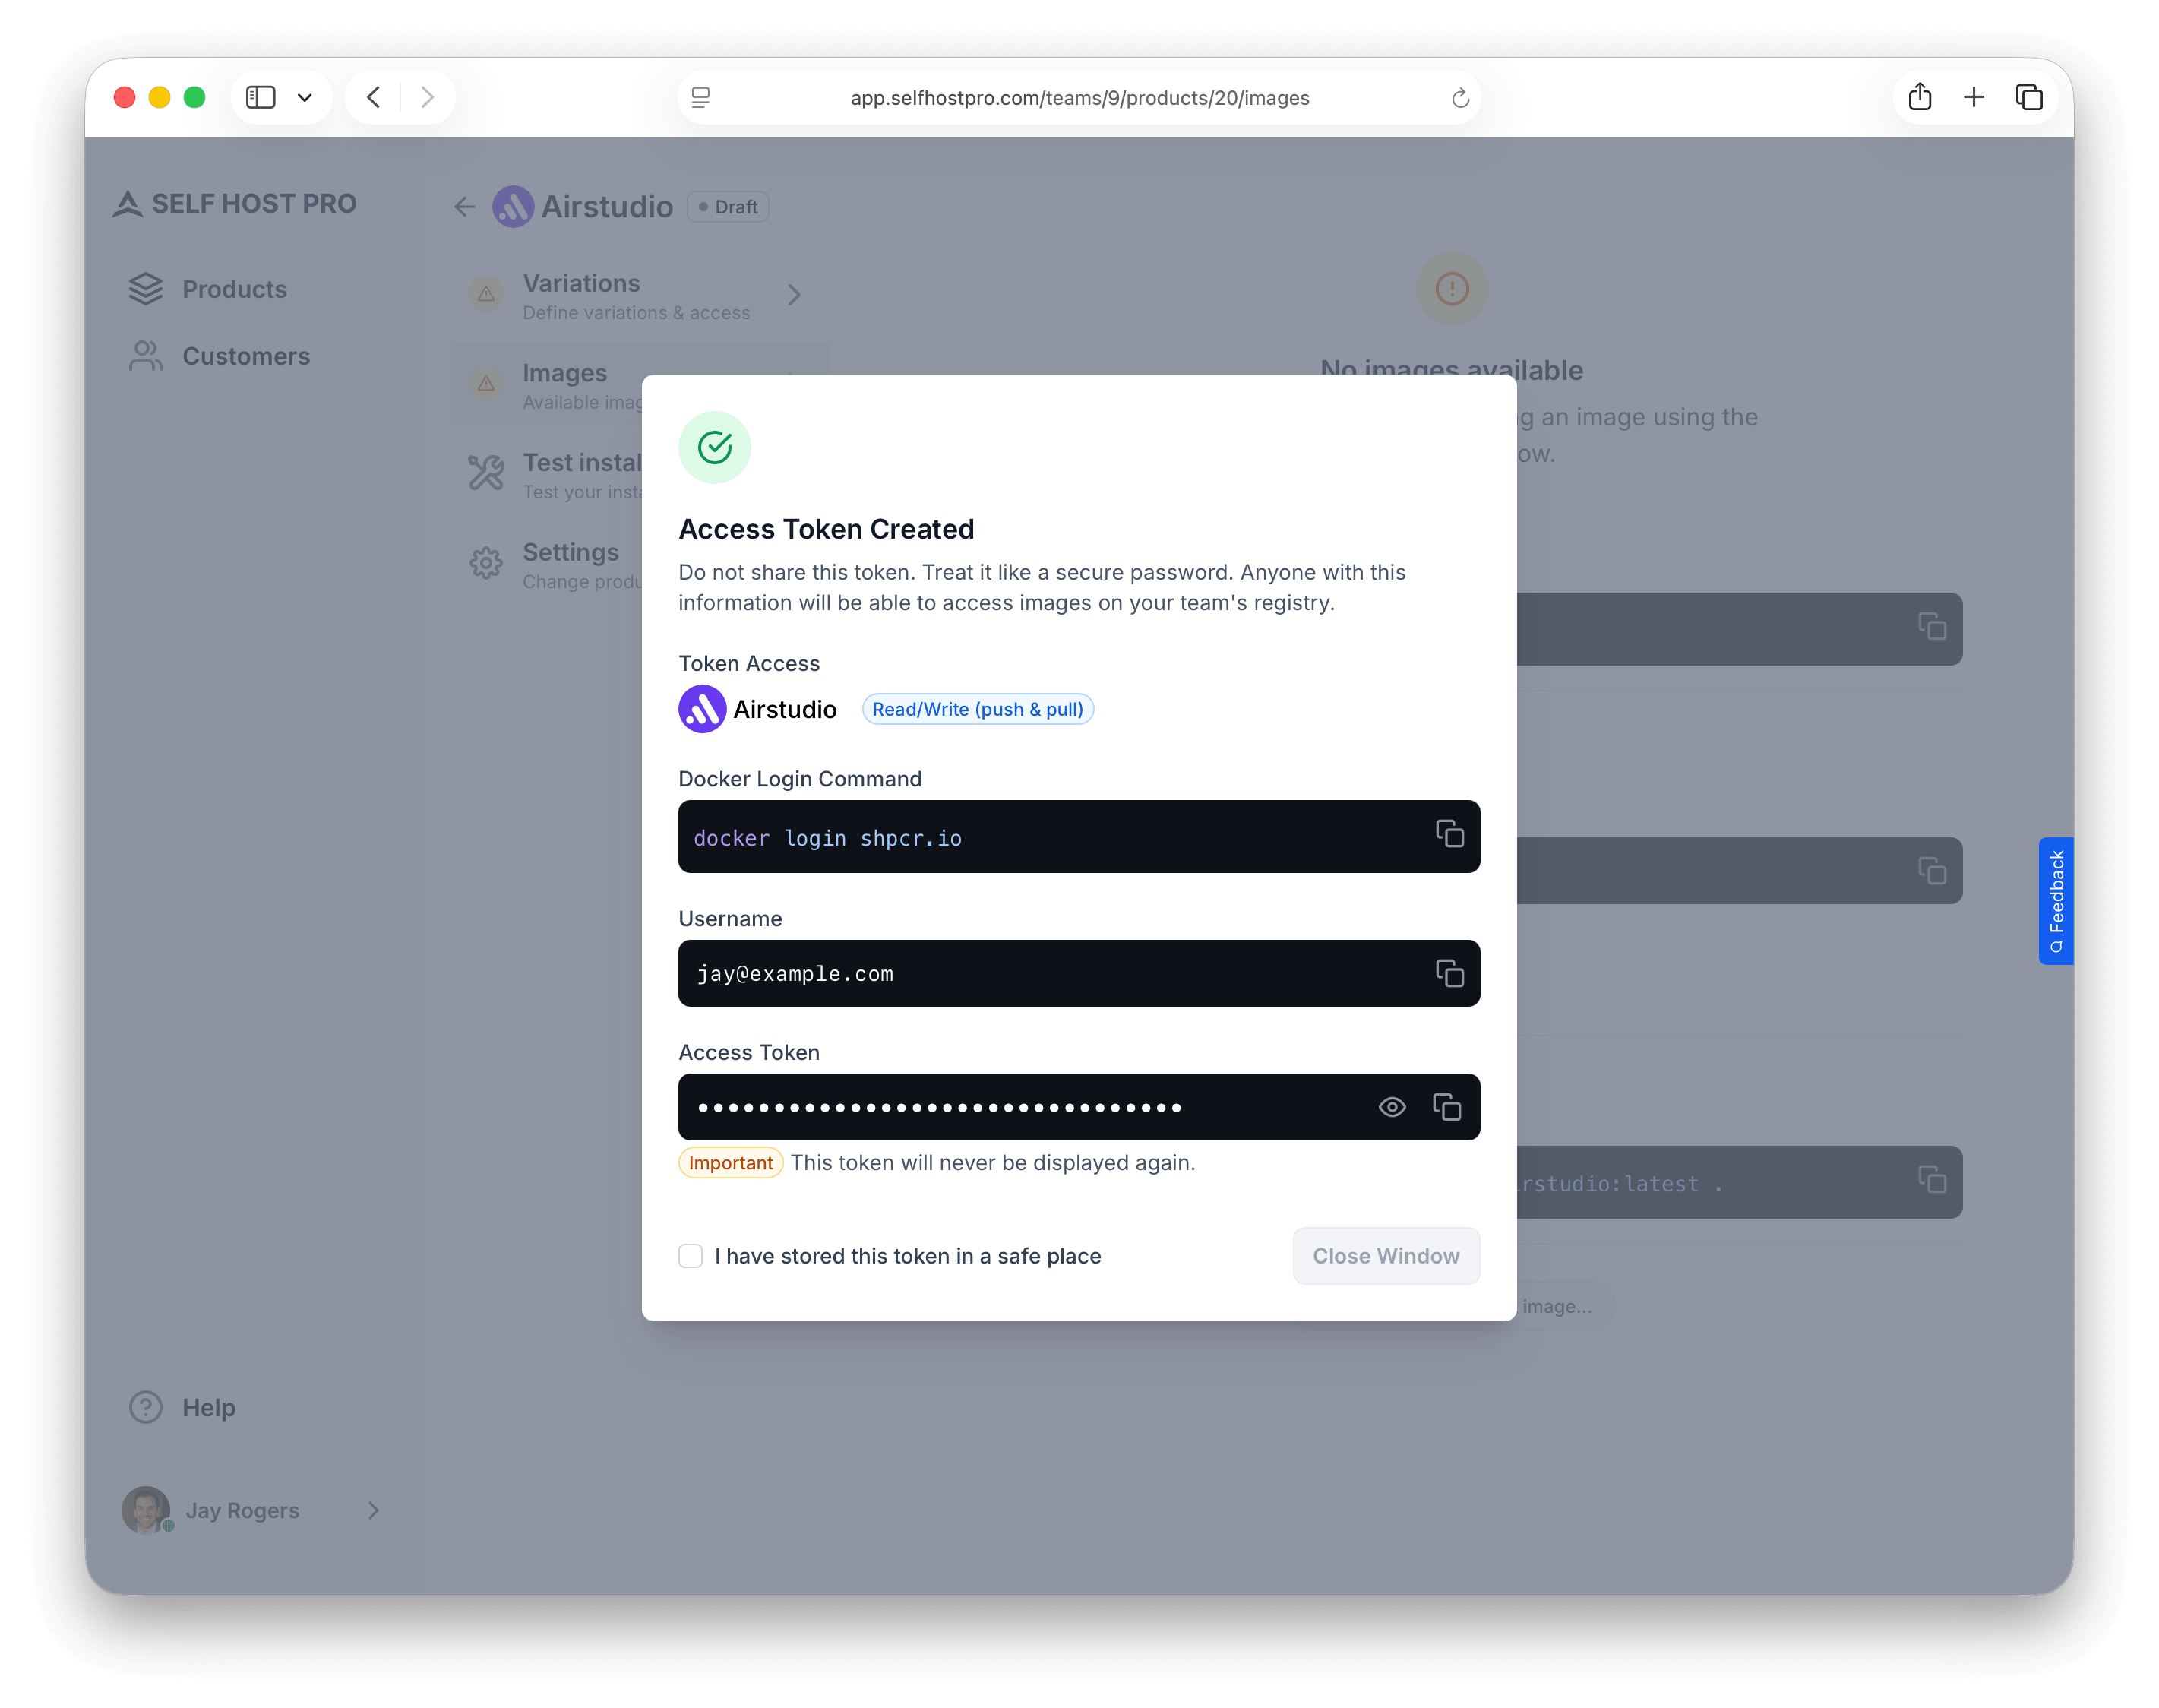
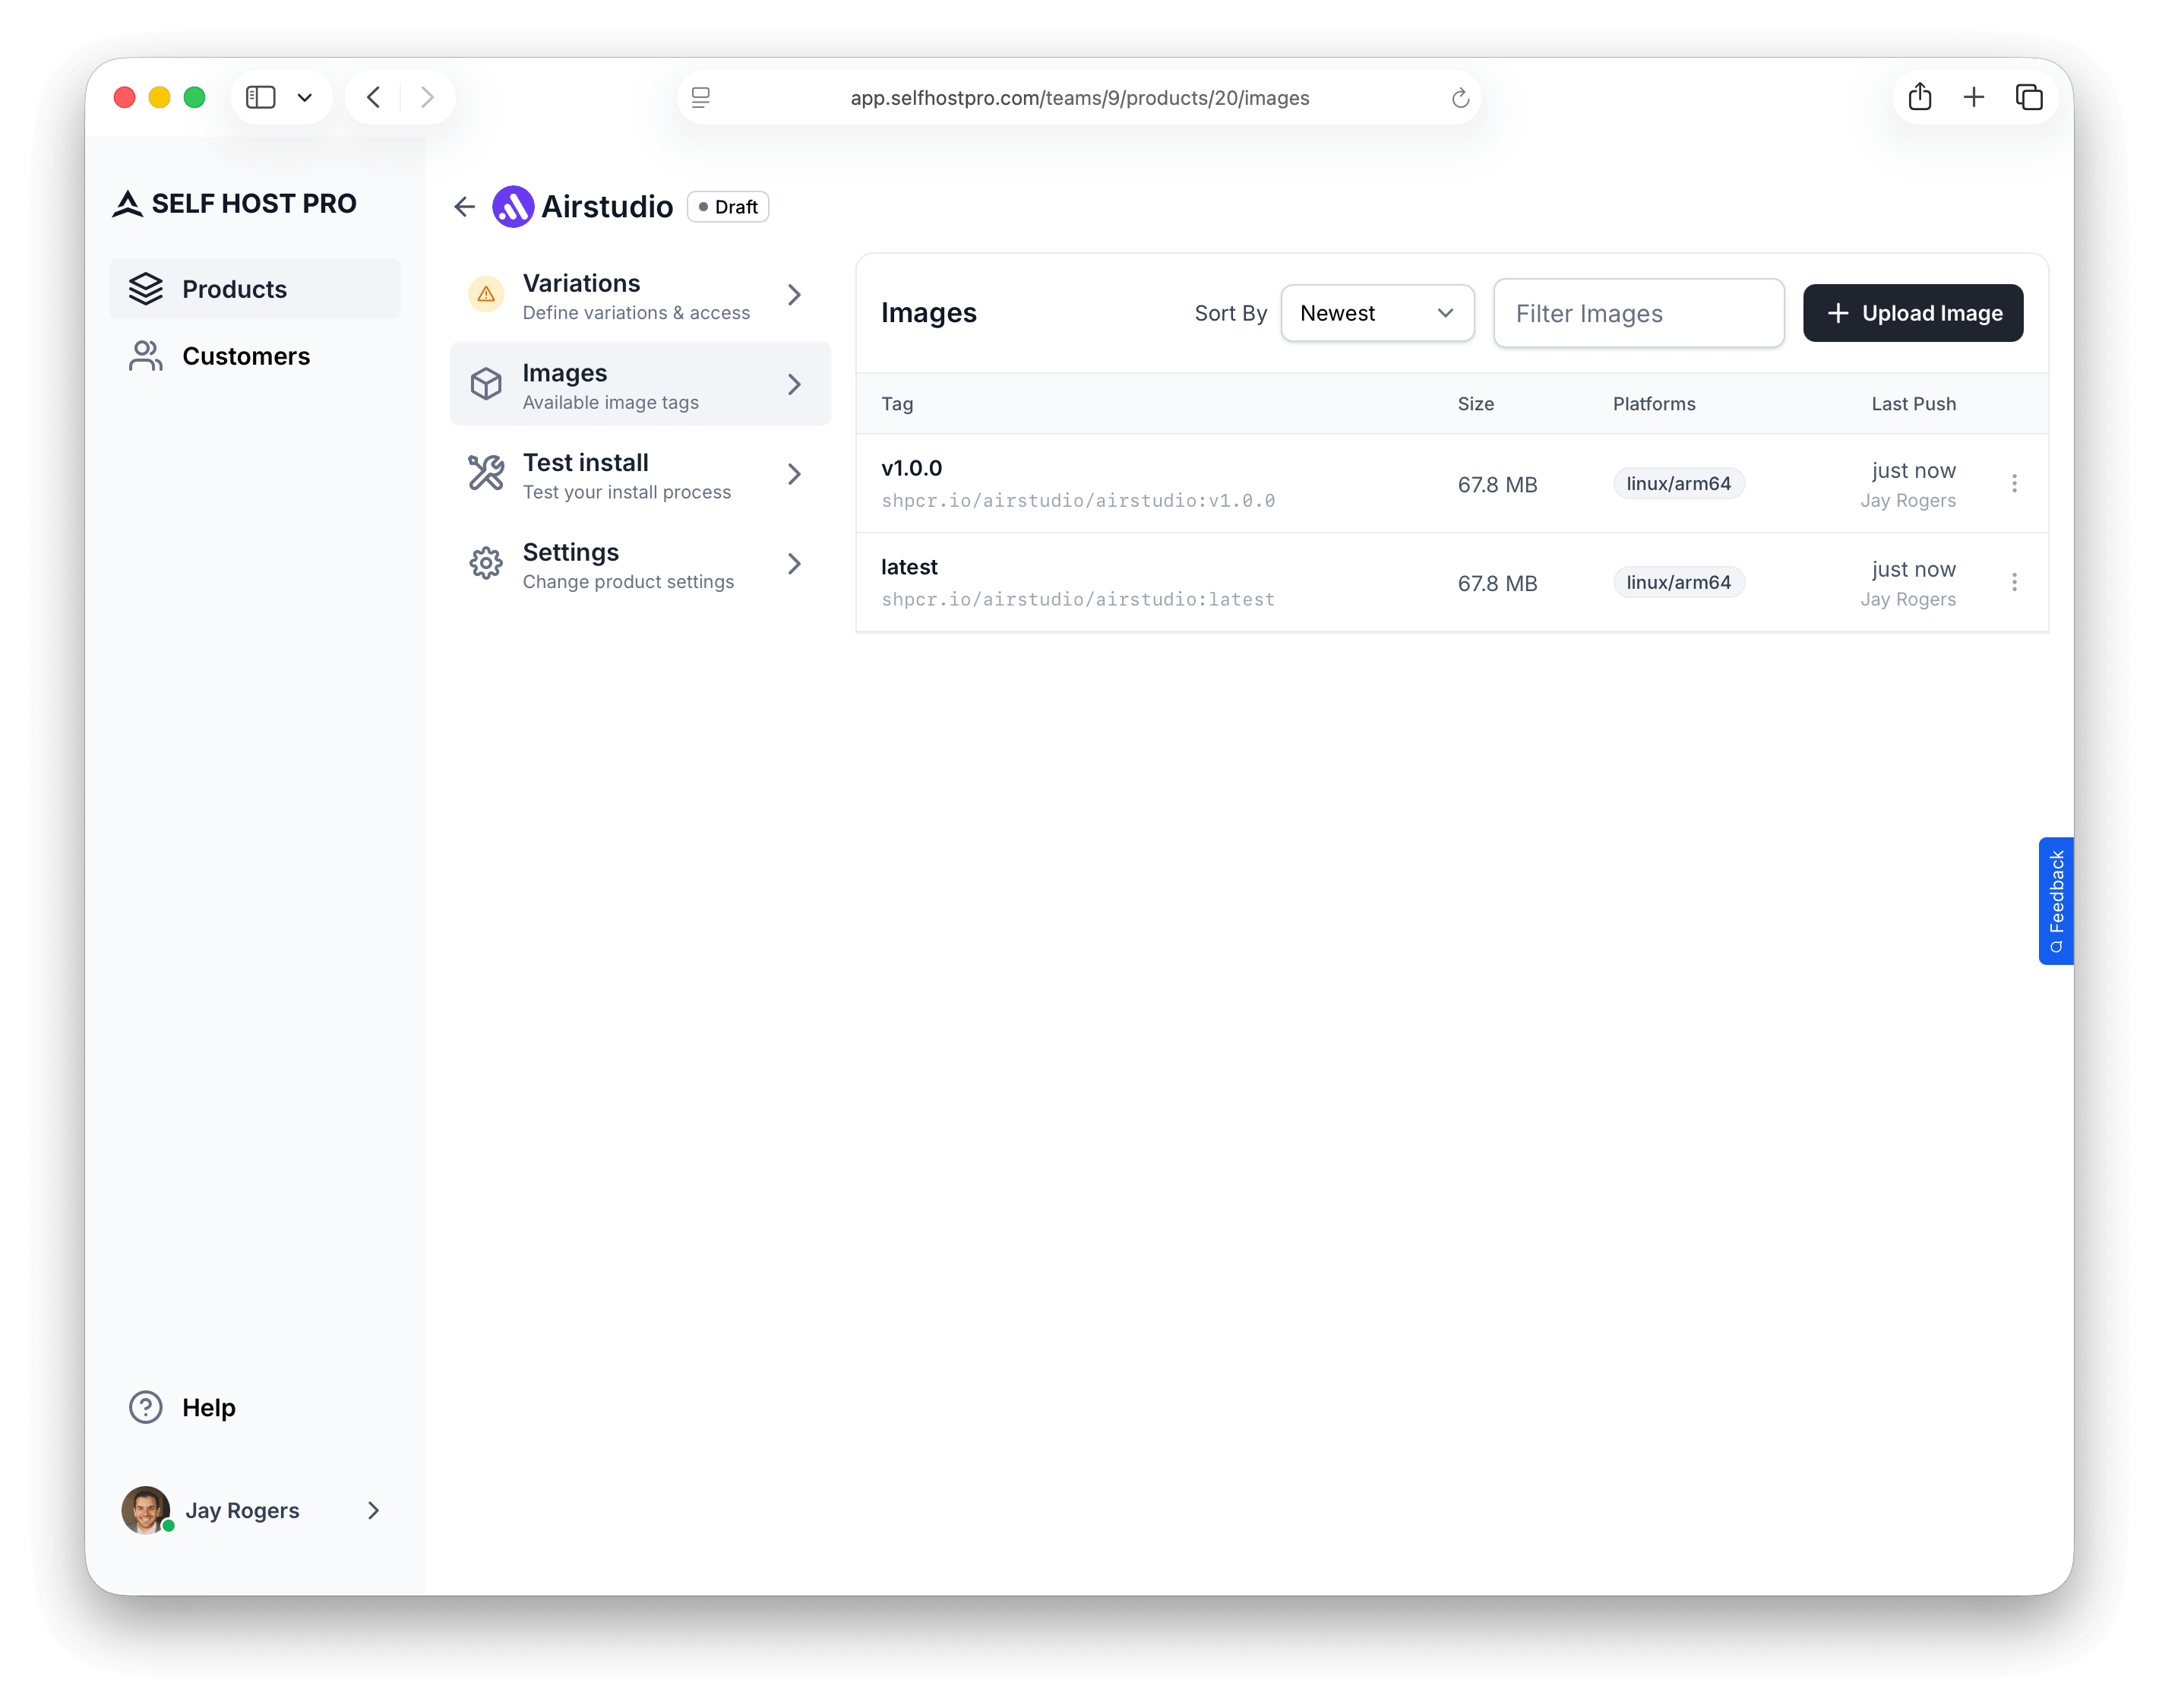
- Go to your product's Images tab
- Click Generate Access Token
- If the generator asks for scopes or permissions, choose an option that allows pushing images (often labeled read/write or similar)
- Save the username (your email) and token — the token is only shown once
Push your image
On the Images tab, copy the exact registry path and suggested docker build command for your product whenever you can—they match what you need below.
Log in to the registry
docker login shpcr.io
Use your email as the username and your access token as the password — not your Self-Host Pro account password.
Build and push
From the directory containing your Dockerfile:
1.0.0, 1.0, latest). This lets customers pin to specific versions or always follow the latest release.docker build --push -t shpcr.io/your-team/your-product:your-tag .
If your Dockerfile has a different name (e.g. Dockerfile.php), add -f Dockerfile.php.
After the push completes, your image appears in the Images tab with a timestamp.
Create a variation
What is a variation?
A variation is one sellable edition of a product. It has its own name, linked payment product, rules for which image tags buyers may pull, and its own install setup (Docker Compose, optional env files and init commands).
One product can include many variations. Use that when you sell different offers from the same codebase—for example yearly releases ("2026" vs "2027"), a lifetime tier, or Basic vs Pro with different tag access.
Mirroring (optional) lets one variation reuse another’s install configuration (Compose, config files, init commands, and options) while you set different pricing or tag rules. See Mirroring variations.
Add a variation
Go to your product's Variations tab and click Add Variation. The sections below follow the same order as the form.
Variation Details
- Variation Name — Customers see this on My Products. Match the in-app hint: make it clear and descriptive (e.g., include the product name and tier, not just "Basic" or "Pro").
Purchase Access
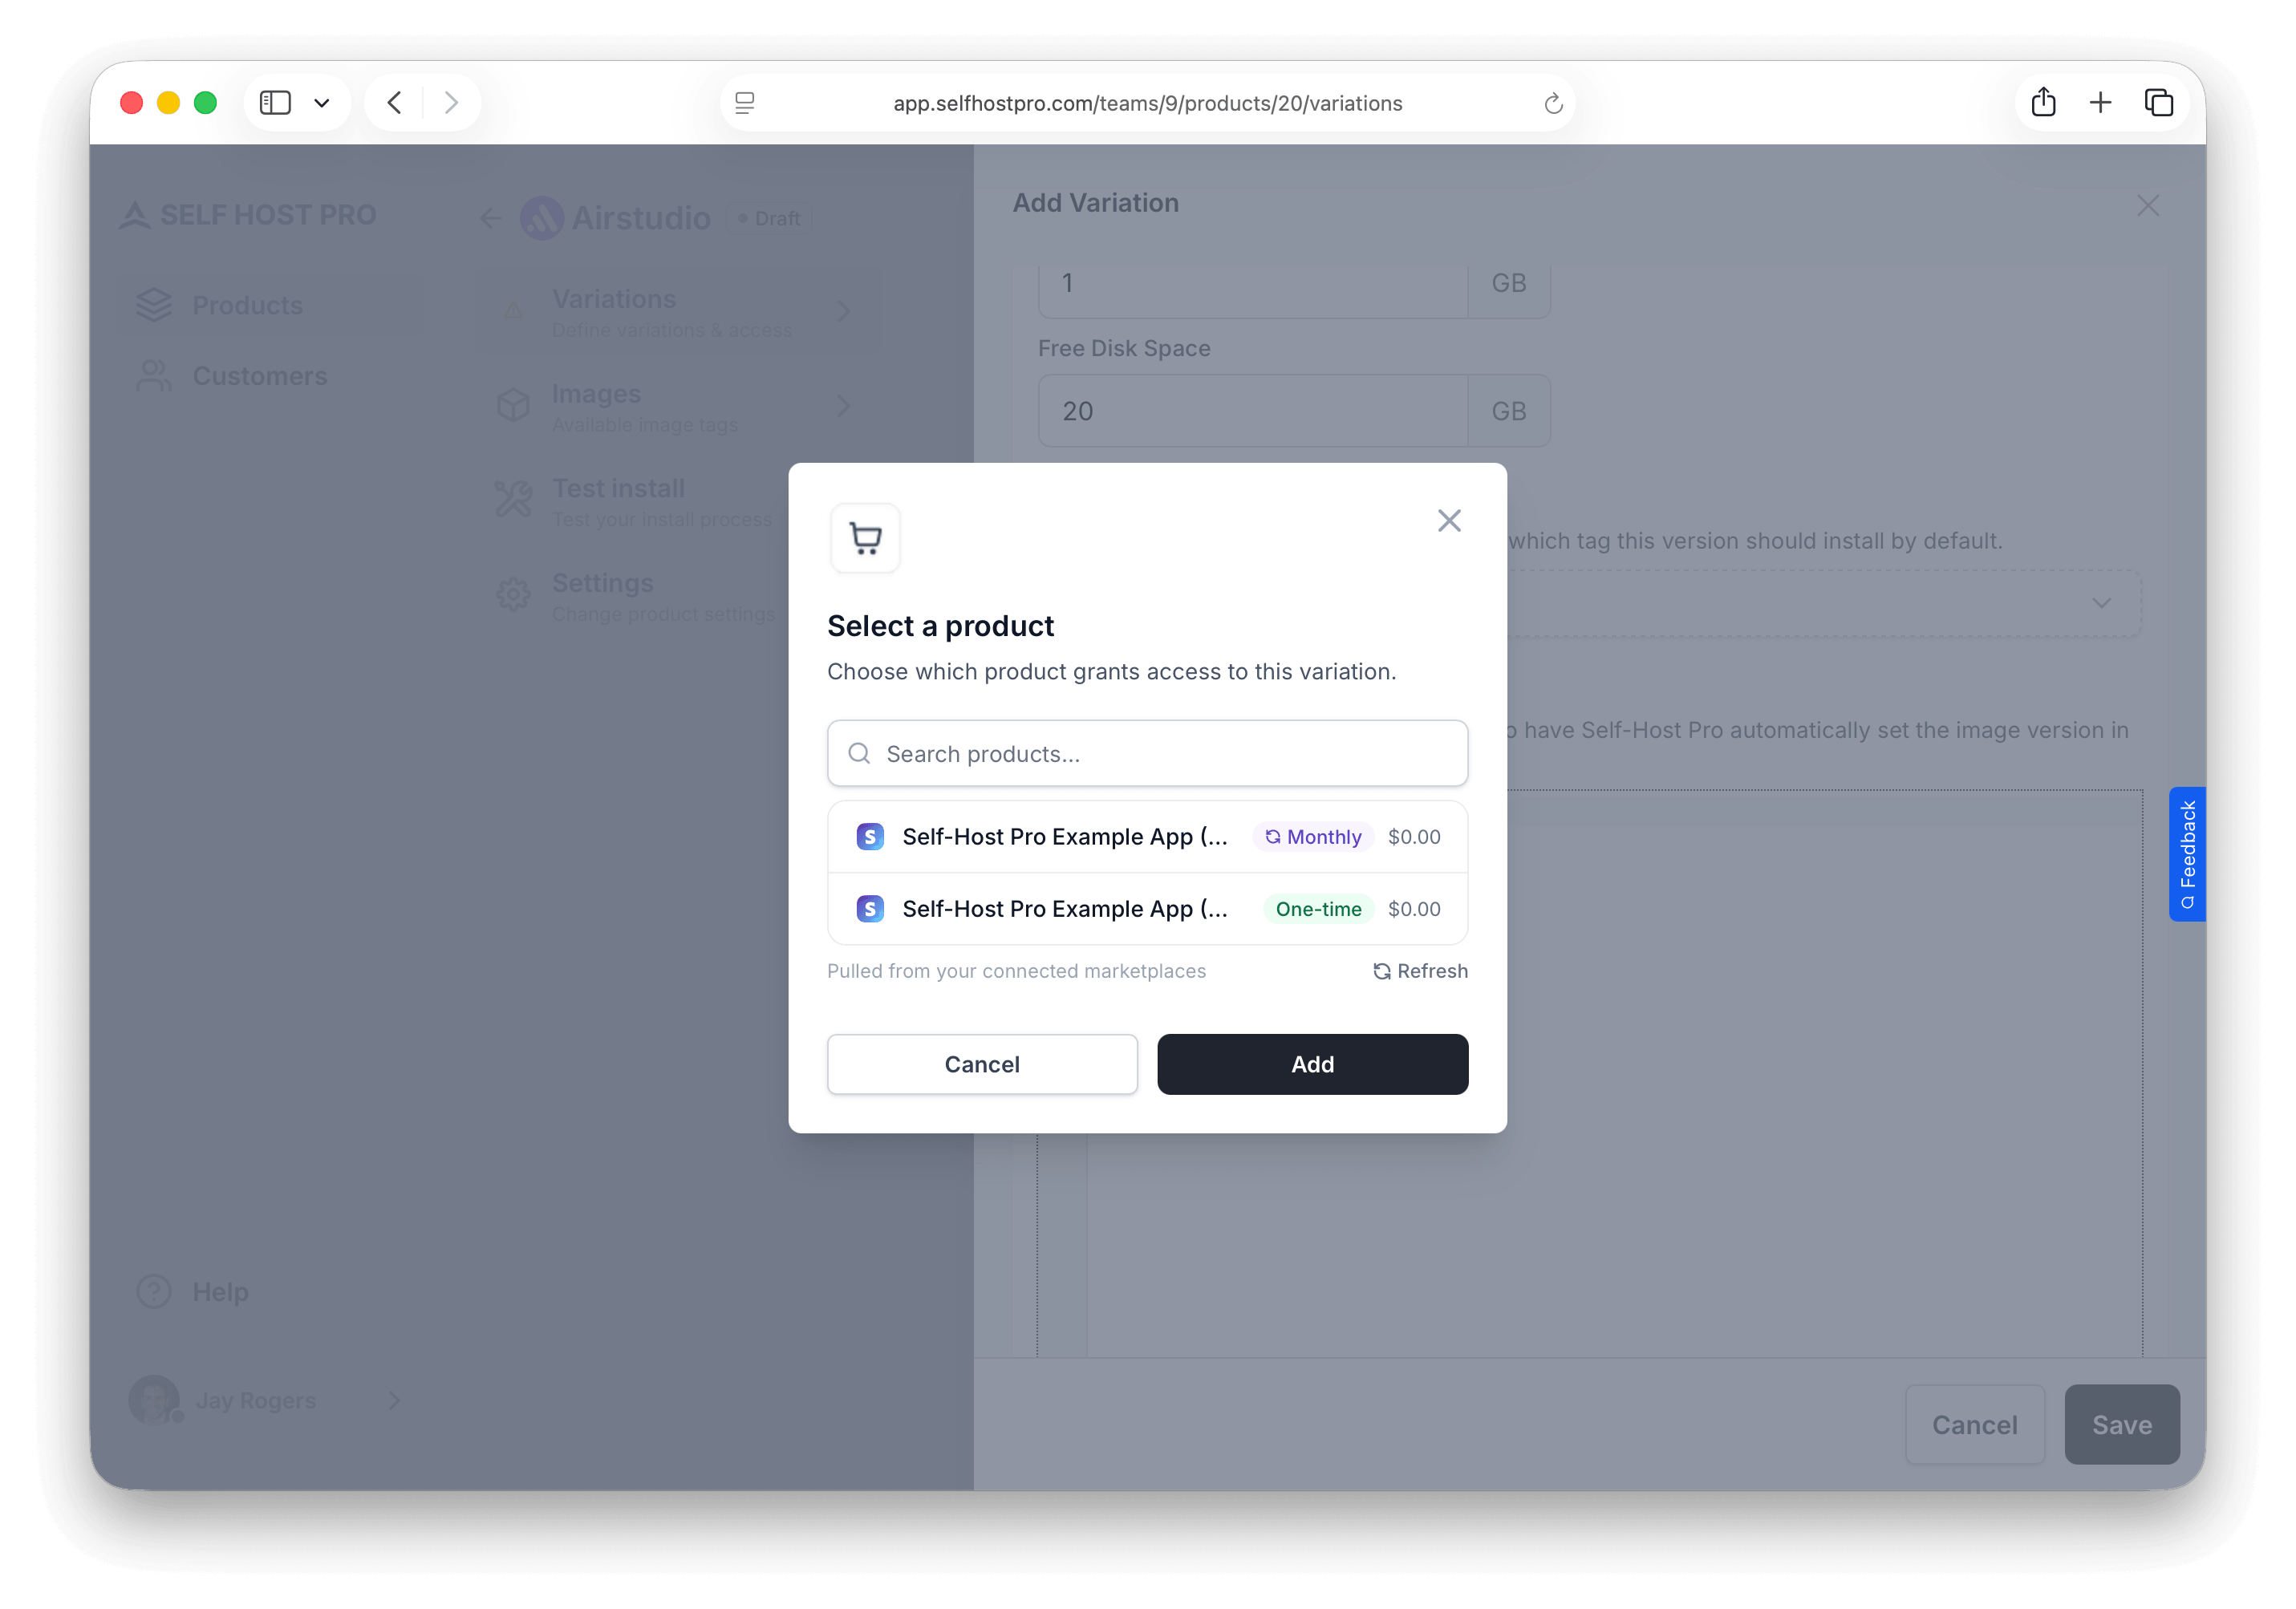
Choose the product that grants access to this version. Link a Stripe or Lemon Squeezy product so purchases grant access to this variation.
- In Stripe or Lemon Squeezy, create a product with your pricing (one-time or subscription). See Payment Providers for provider-specific setup.
- In the Purchase Access section, click Add Product.
- Choose your integration and the product from the list.
- For one-time products, set access duration — Never expires or Expire after X days. For subscription products, access follows the subscription; you do not set a day count in Self-Host Pro.
See Variations — Purchase Access for how access works for subscriptions, one-time purchases, and expiry.
Image Tag Rules
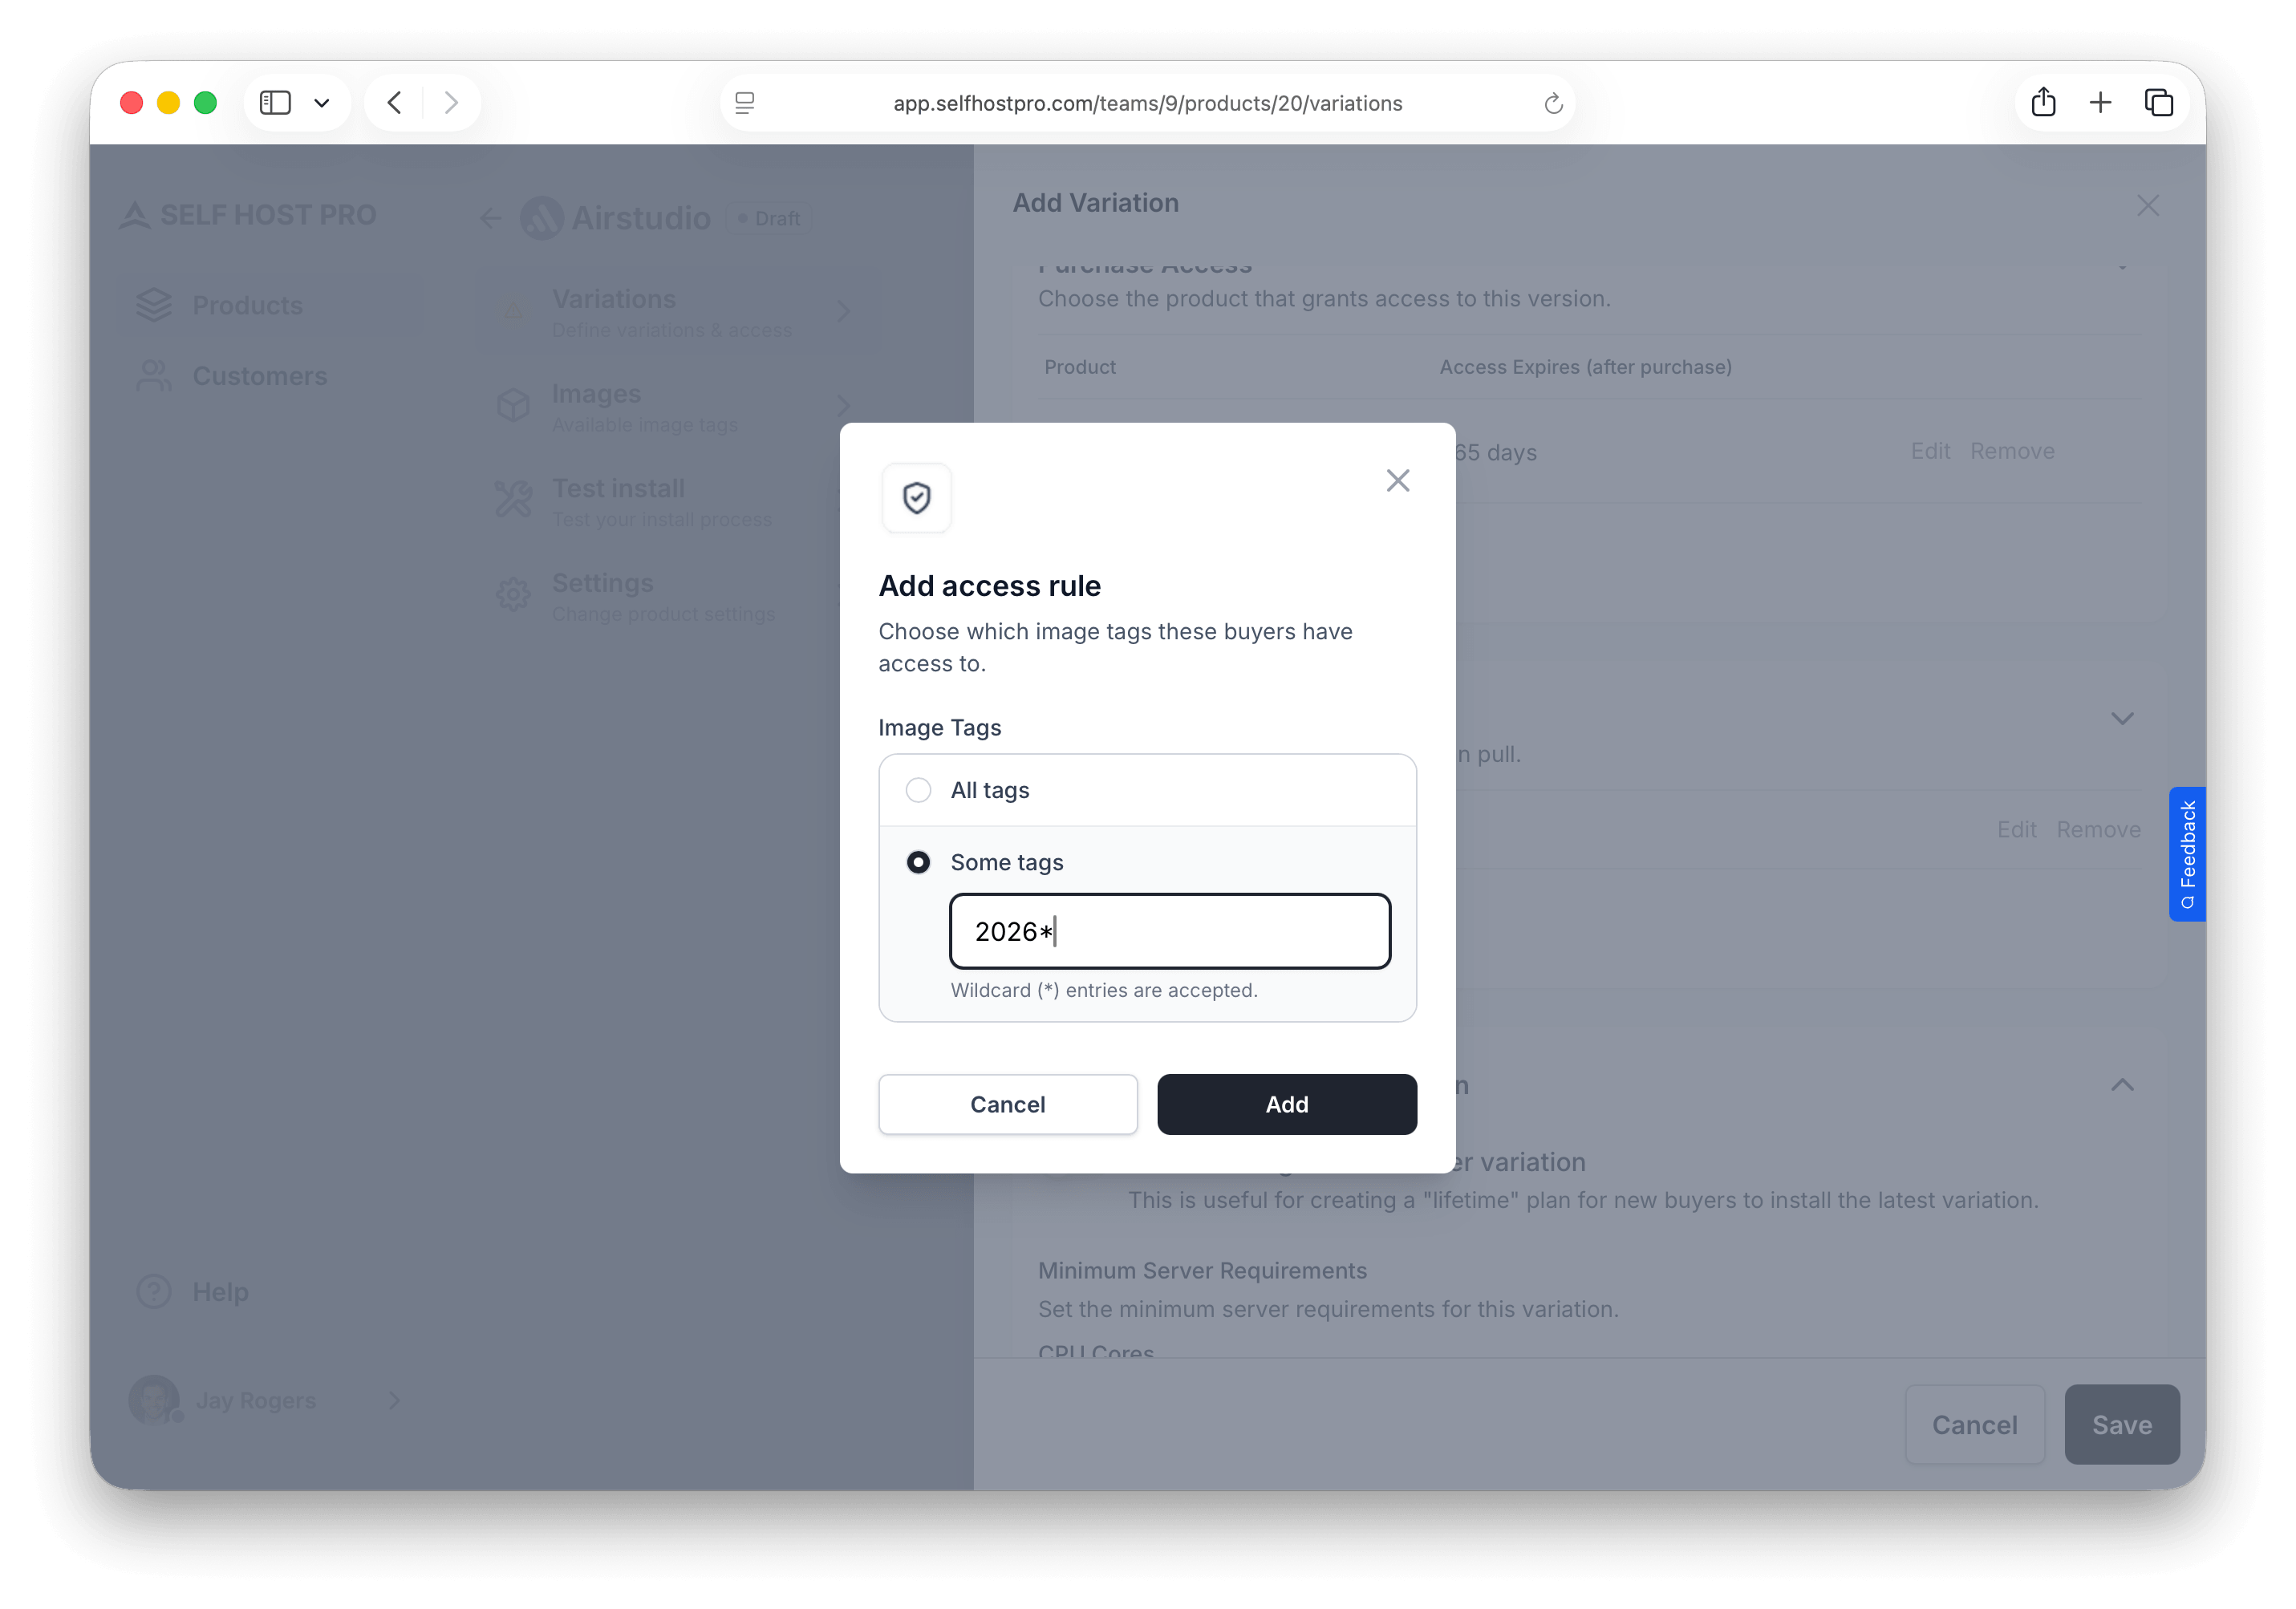
Control which image tags customers can pull. This is how you gate versions per purchase: one variation might allow only v1.* while another allows * or pro-*, so buyers only get the images that match what they paid for.
Click Add Rule and choose All tags or Some tags with a pattern. See Variations — Image Tag Rules for wildcards and tiered examples.
Installation & Docker Configuration
Mirror settings (optional)
Turn on Mirror settings from another variation to reuse another variation’s Docker Compose, configuration files, initialize commands, and installation options at install time. The UI notes this is useful when you want a separate purchase path (for example a “lifetime” plan) while new buyers still install the latest mirrored variation. See Mirroring variations.
Minimum Server Requirements
Set the minimum server requirements for this variation. The install script checks these before proceeding:
- CPU cores — Minimum CPU cores required
- Memory — Minimum RAM in GB
- Free disk space — Minimum free disk space in GB
Default tag to install
When customers first install, choose which registry tag this variation uses by default (Select a default tag…). The list includes tags you have pushed for this product. This tag will be the default tag that will be installed when customers install this variation.
${SELFHOST_PRO_VERSION} placeholder in your docker-compose.yml file to reference the default tag.services:
app:
image: ${SELFHOST_PRO_VERSION}
ports:
- "8080:8080"
Docker Compose file
Paste standard docker-compose.yml you would run in production. Self-Host Pro stays Docker-native: you do not invent a custom format; the install flow supplies registry and tag details for you.
Use ${SELFHOST_PRO_VERSION} on your app service’s image line so each install resolves to the correct shpcr.io/... reference and tag instead of hard-coding them (see Variations):
services:
  app:
    image: ${SELFHOST_PRO_VERSION}
    ports:
      - "8080:8080"
environment:
- APP_URL=${APP_URL}
restart: unless-stopped
${APP_URL} and ${APP_DOMAIN} can be set three ways: enable Prompt for install domain and Self-Host Pro auto-detects and asks the customer for their domain; ship a config file with a default value and enable Prompt to edit so they can change it in nano/vim; or pre-fill a default and ship it as-is. See Advanced install options.Advanced install options
Four optional toggles configure the install experience:
- Prompt for install domain — Asks the customer for their domain or IP at install time and writes
${APP_URL}and${APP_DOMAIN}to the.envautomatically. - Configuration files — Ship
.envfiles, reverse proxy configs, or any other files the app needs on disk before it starts. Set permissions, ownership, and optionally prompt the customer to edit the file during install. - Initialize commands — Run setup tasks (migrations, key generation, seeding) from the project directory on the host server before the app starts. Commands run in order; installation stops if any fails.
- Auto-start after install — Runs
docker compose up -das the final step so the app is live immediately.
See Variations — Installation for full details, examples by framework, and file ownership guidance.
Test the flow
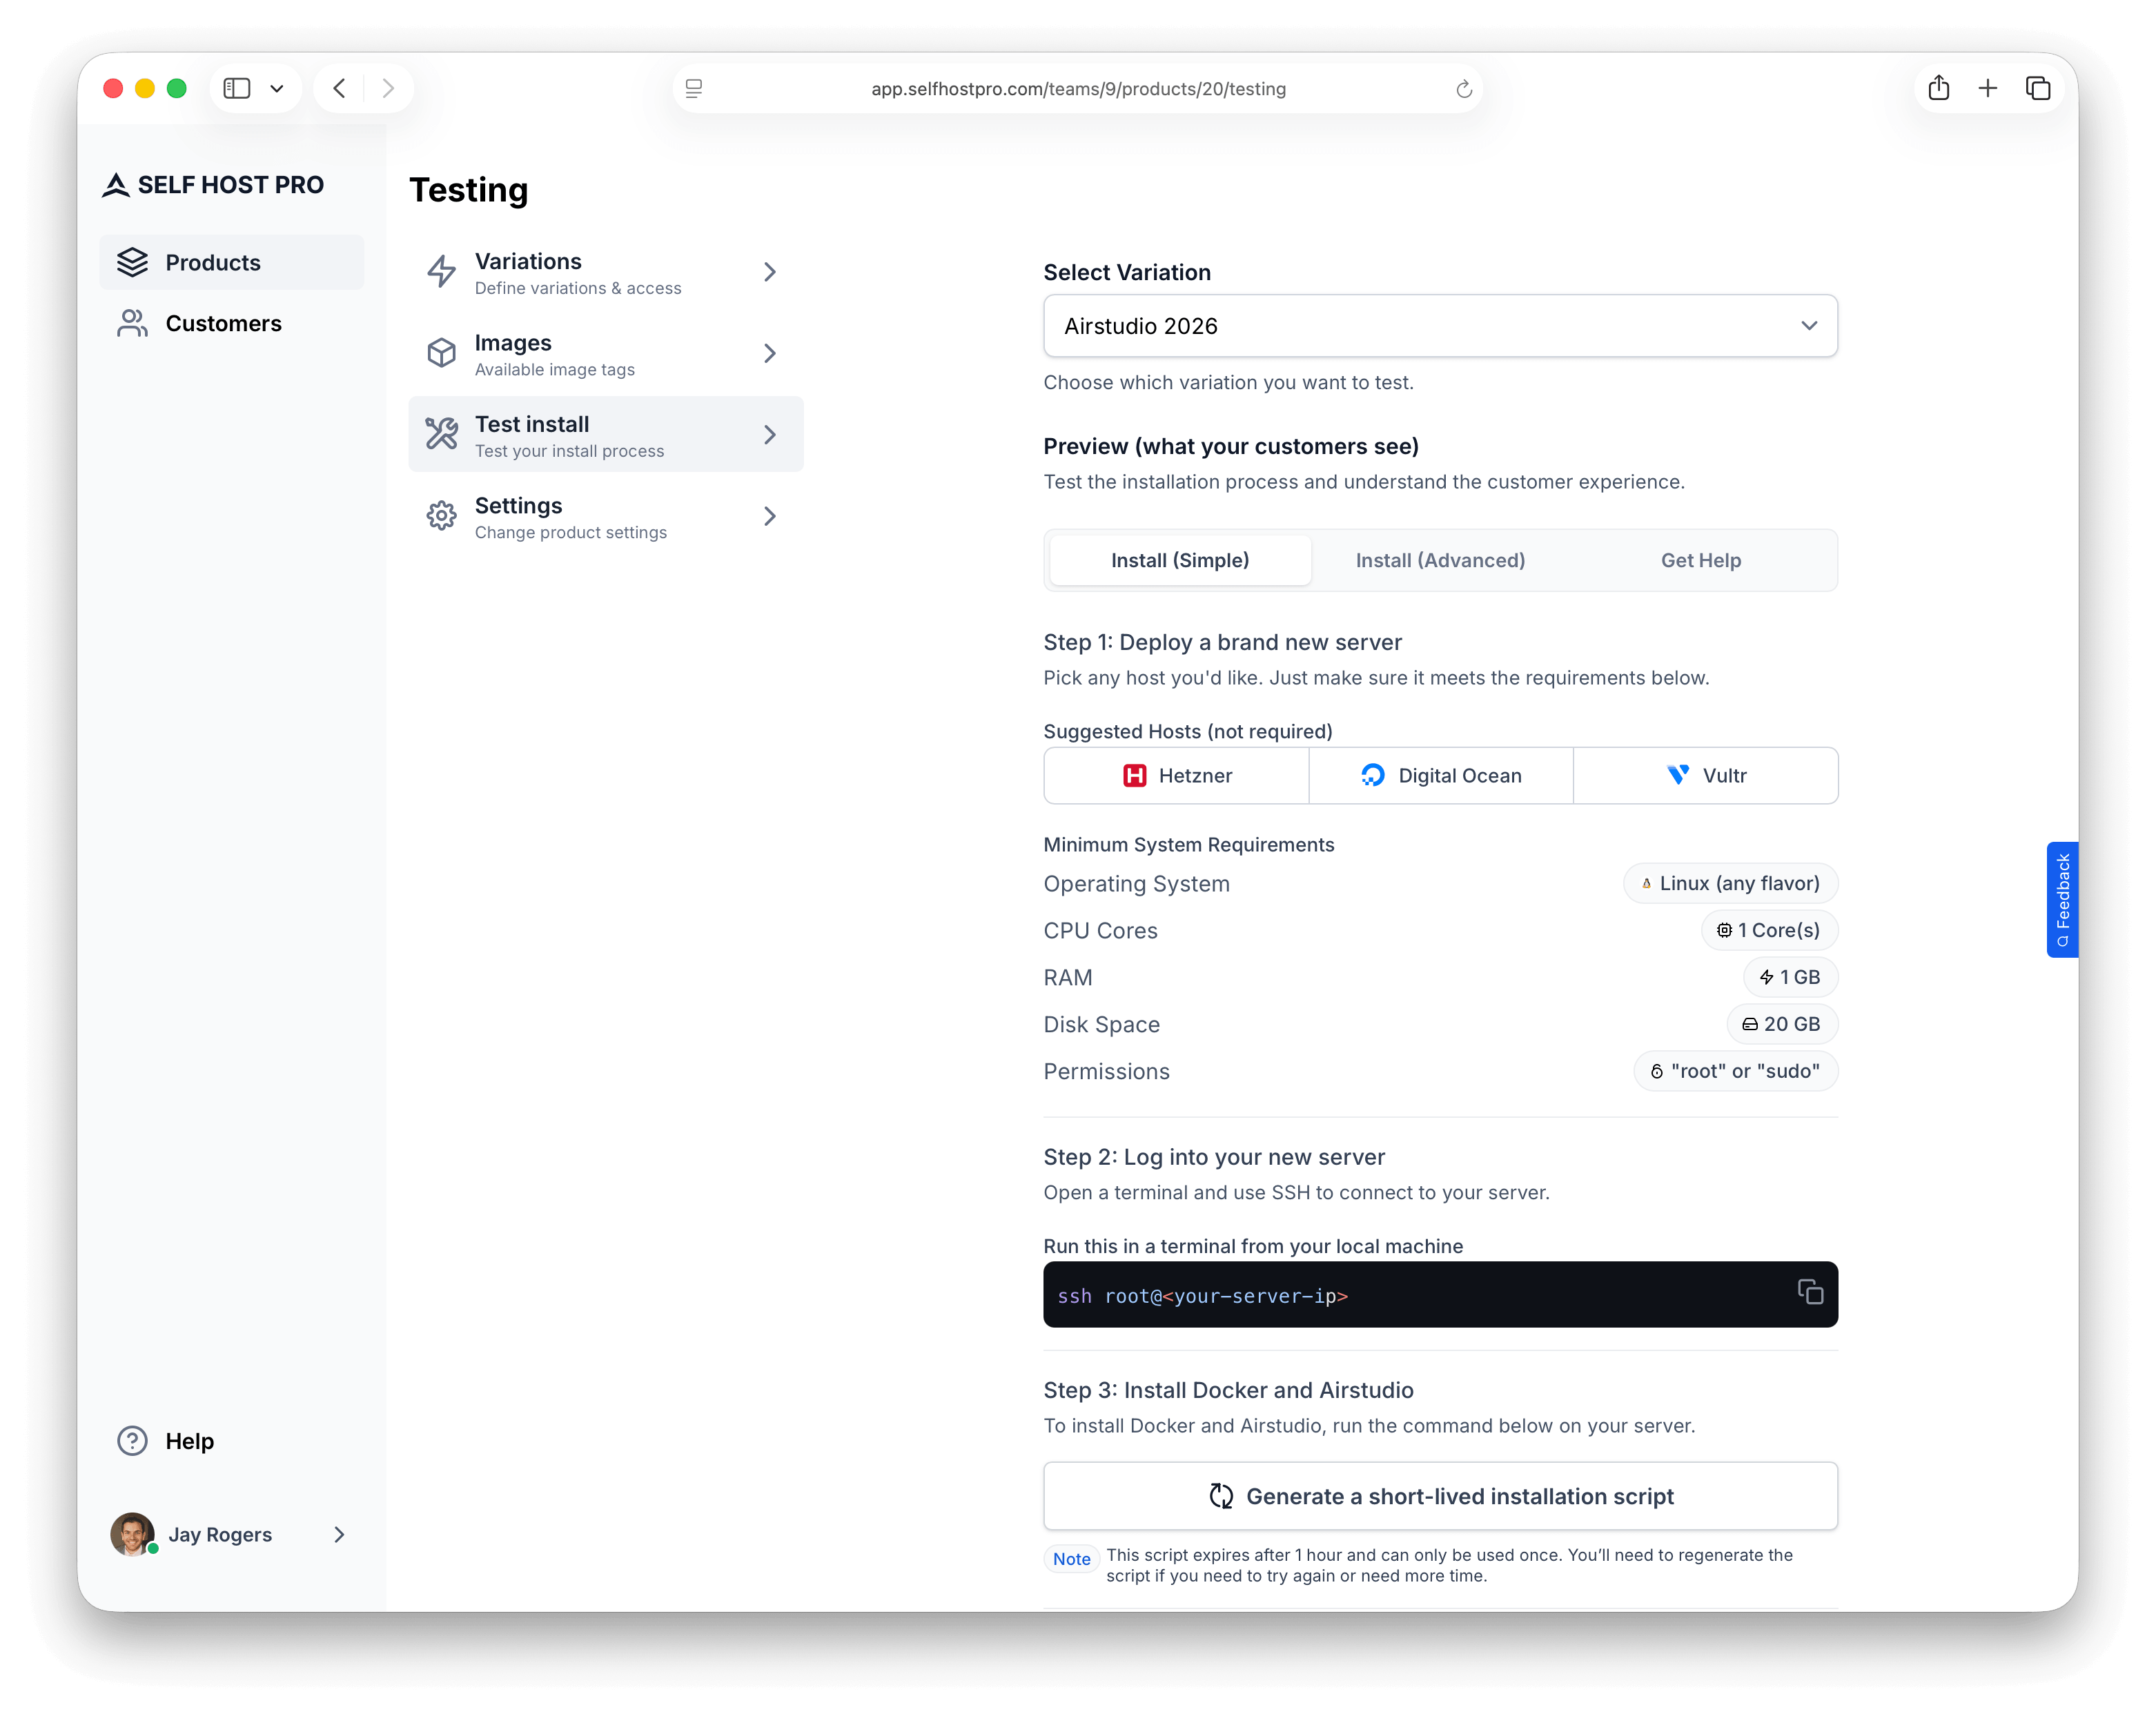
From the seller dashboard
On a variation, use Test install to open the same install experience customers get (simple and advanced options) and to generate a short-lived install script you can run on your own server before anyone purchases—useful to validate Compose, env files, and init commands end-to-end.
End-to-end with checkout
Connect your product to a payment provider sandbox and create a test product. Make a test purchase and open the customer install flow and generate an install script.